Toys spark imagination. That’s what they’re supposed to do. The good guy beats the bad guy, but how the hero gets from point A to point B is up to you. As a 37-year-old man, I feel that my time in executing all those grand adventures on the living room floor has passed. So instead of swimming pool battles and sandcastle sieges, I’ve turned to photography. You can mask toy photography as “grown-up” or “artistic expression” all you want, but at the end of the day — it’s just having fun playing with toys.
The camera, however, doesn’t see that sandcastle as an impenetrable fortress; it just sees a sandcastle. And this brings us to the point (finally!). Dio in a Day is just that. It’s a diorama or playset that I’ve built in just a day for the purposes of photography. A single photo is often the end goal, but getting from point A to point B is still so much fun.
Episode IV Cantina Booth
Plans
The first thing to do is plan your shot. I’ll be the first to admit that I’m no model builder. I have neither the skills nor the patience to create screen-accurate shots. Keeping my limitations in mind, for anything that has specific visual reference material (such as the cantina scene), I know that my focus will be on the figure rather than the background. The emphasis here is on feel. If my scene feels like a Starbucks instead of a dirty cantina, then I know something went horribly wrong.
Gathering Materials.
Scratch-building on the cheap is a hobby in and of itself. It gives you the chance to be creative and to improvise. This particular build has just a few ingredients, all of which can be purchased at your local hardware store or Walmart.
- Polystyrene insulation foam (the pink stuff)
- Foamcore board
- 4 dryboard erasers
- 1 swimming pool noodle
- 1 plastic “For Sale” sign
- Small piece of tubing
You’ll also need the basics: X-acto knife, ruler, pencil, paints, glue, paint, and sandpaper.
The Build
The first step is to make rough cuts of the walls. I use that pink polystyrene insulation foam that you can find at Home Depot. Typically, it cost about $17 for a huge 8-foot sheet, or you can buy a much smaller 2×2 sheet for around $6. It’s thick and sturdy and can withstand the weight of most average-sized figures. For these quick builds, I typically eyeball it as much as I can with a figure used as reference. Since I didn’t yet have my Black Series Wave 2 in hand, my buddy the Sandtrooper helped me out.
Generally speaking, applying spray paint to foam is a big no-no as the chemicals will eat away at the foam. For the cantina walls, I needed a bit of texture, so a very thin coat of spray paint over the entire thing was enough to do the trick. You don’t want to overdo it or you’ll end up with craters and bubbles in the foam.
Once that’s dry, go ahead and round off the edges of all walls and the window hole with sandpaper to avoid that fresh-cut look. This type of foam takes sandpaper pretty well. I went ahead and added a bunch of cracks and crevices with my knife.
A curved ceiling might seem like a pain in the neck, but with foamcore board, it’s really no trouble at all. Foamcore board, if you didn’t know, is really just two pieces of heavy paper with a foam center. You can get it pretty much anywhere and it’s a staple in dio-building.
Cut the board to the desired width. In this case, it was width of the couch. In order to make the curve, you’ll have to make a cut every inch or two on the board. You only want to cut through one side of the board and the foam center — leaving the other side intact.
Once the ceiling has been cut, I made a couple of grooves in the floor with a soldering iron. This tool is awesome for carving out rough details in foam. Just be sure to wear a ventilator as the fumes are pretty toxic once the melting begins. Of course, you can always use a knife to make the groove, or forgo the step entirely if you want to rely solely on glue.
Paint
I use cheap craft store acrylics for my paint. They came in every color you’d want, are easy to mix, and dry very quickly. Perfect for one day dios. Coat the walls in the hue of your choosing and then go back over it with some dry brushing. You should begin to see all the texture caused by the spray paint.
Cantina Assemble!
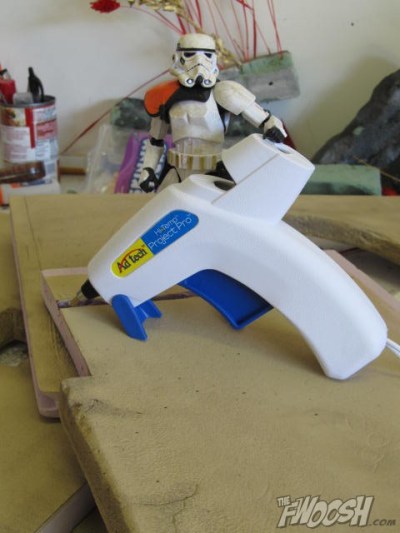
When working quickly, a hot glue gun is a great tool to have. I got this one at Walmart for only $6. It’s easy to use and the glue dries almost instantly. You can use ordinary white glue (like Elmers), but you’ll have to secure it with clamps or tape until the glue dries. But Greedo has a reservation at 6, so best not keep him waiting.
Table and Chairs
I knew the table and chairs would be the hardest part of the build. Especially to do it quickly and on the cheap. A resemblance was all I was aiming for, and I just had basic shapes in mind when hunting for supplies.
The Chairs
The chairs are made out of four dry-erase erasers and they run around $2 apiece. The seats are going to be mostly hidden in darkness, but it’s a good idea to give them a few details just in case. You never quite know what angles are going to work in the shot. The cushions in the film had rows stitched into them, so that’s what I decided to go with.
Use your X-acto knife to cut guidelines down the length of the couch. Rather than measuring with a ruler, you can just use a small craft stick to maintain a consistent width. Once the lines are cut, simply run a dull instrument (nail, pencil tip, etc.) down the line to create a bit of groove. Slap some paint on it and you’re done!
The Table
The table is constructed out of a segment of a swimming pool noodle, the back of a plastic “For Sale” sign, and a small piece of tubing for the space candle. The total cost is around $3.
After the pool noodle is cut to the desired height, use it as a guide to cut the “For Sale” sign. I went with the sign as it’s a thin, cheap, and easily cut piece of plastic that takes spray paint very well. This will be used as the table top and the sides of the table. You’ll need to paint the noodle with acrylics, but the sign can be easily painted with spray paint. Get out your glue gun and call it a day!
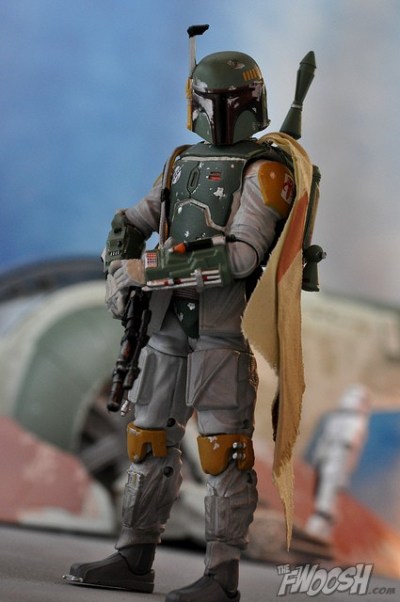
And there you have it! This build took me around four to five hours to complete and I enjoyed every minute of it. The fact that wave 2 of the Black Series is so close to perfection is just icing on the cake.
Thanks for reading!
Wave 2 Bonus Shots!


Purchase Star Wars Black Series Wave 2 at BBTS


